
This guide takes you from nothing installed to a running translation session. Follow the sections in order — each one builds on the last.
1. Download the app
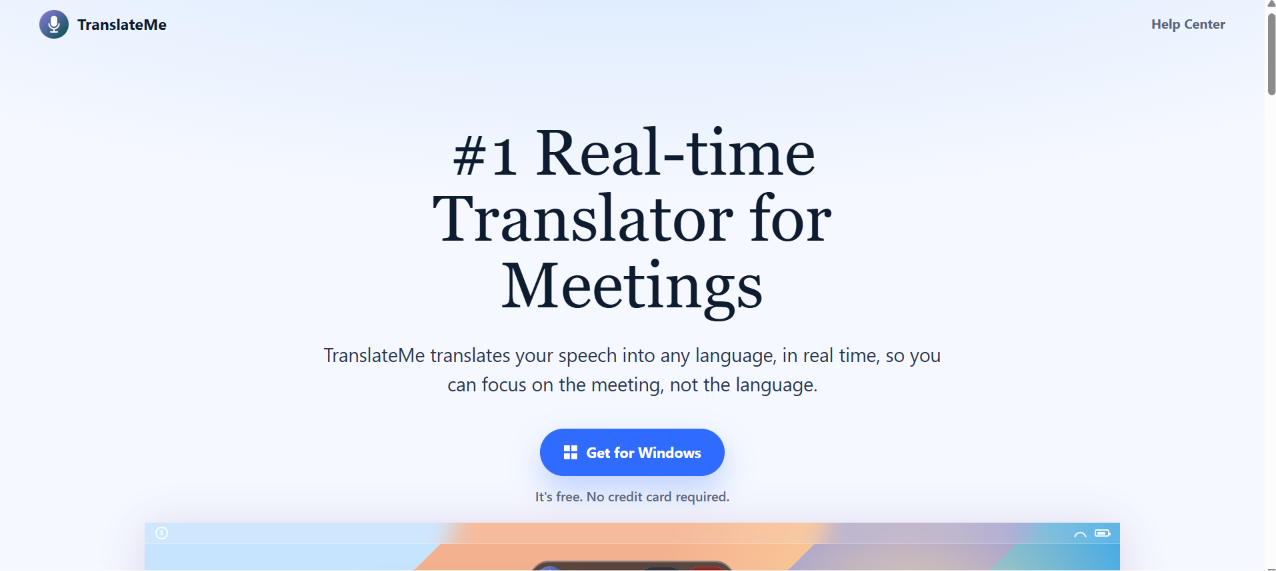
Download the TranslateMe installer for Windows:
Download TranslateMe for Windows
The download starts automatically and saves TranslateMe-Setup.exe to your Downloads folder.
2. Install the app
Double-click TranslateMe-Setup.exe to run the installer.
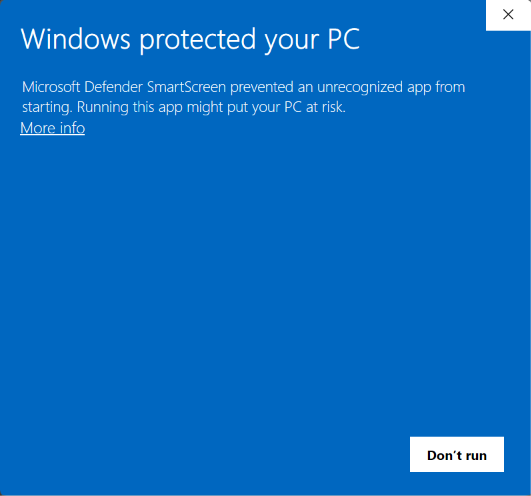
The first time you run it, Windows may show a blue "Windows protected your PC" screen. This is Windows SmartScreen warning about a newly published app — it does not mean the app is unsafe.
By default this screen only shows a Don't run button. Click More info to reveal the option to continue.
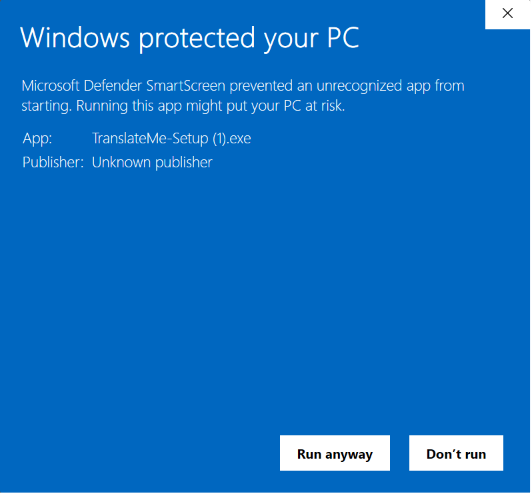
After clicking More info, a Run anyway button appears. Click it to start the installer.
The installer then finishes on its own and opens TranslateMe when it's done.
3. Create your Account
The first time TranslateMe opens, you land on the sign-in screen. You need to sign in before you can start a translation session. There are two ways to do it — pick whichever you prefer.
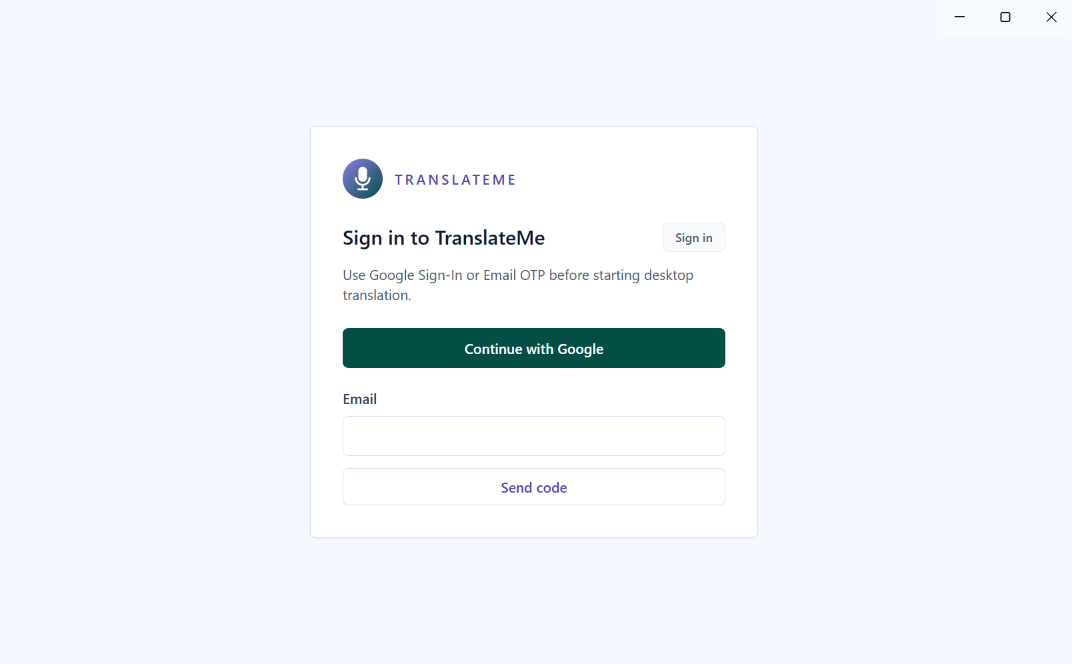
Option A — Continue with Google
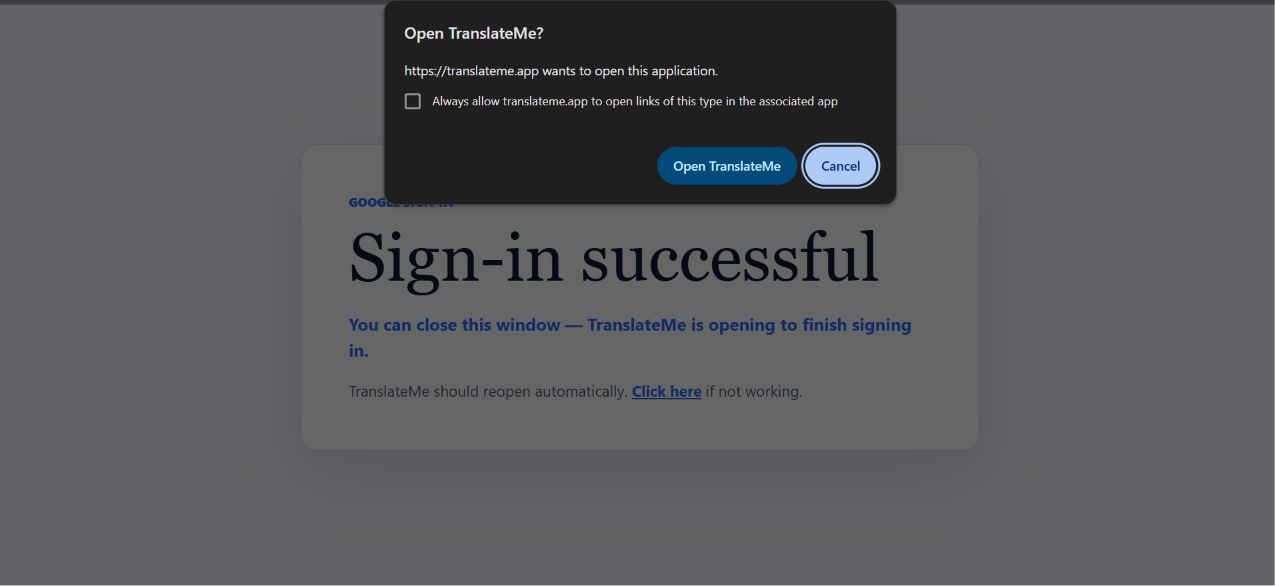
Click Continue with Google. Your browser opens to complete the Google sign-in. When it finishes, the browser shows a Sign-in successful page and asks to reopen the app — click Open TranslateMe to return to the app, now signed in.
Option B — Email code
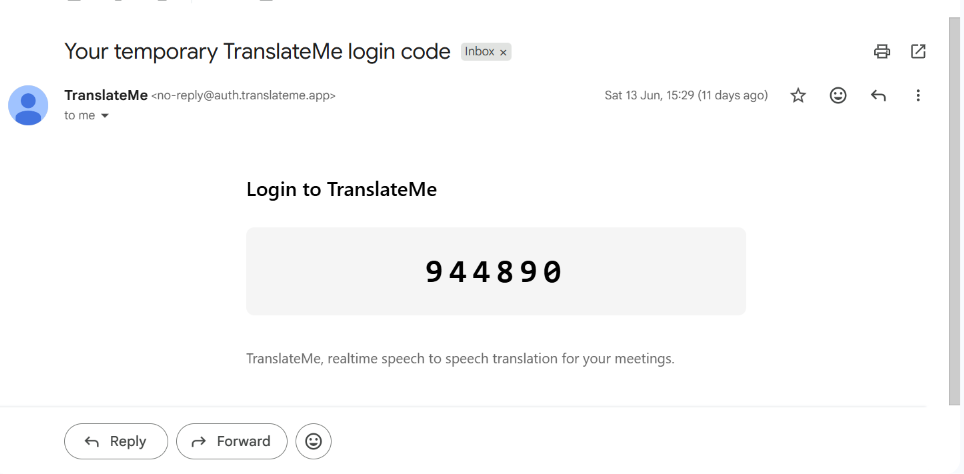
Enter your email address and click Send code. TranslateMe emails you a six-digit login code. Open the email, copy the code, and enter it back in the app to finish signing in.
4. Install a virtual audio cable
TranslateMe sends translated audio into a virtual audio cable — an audio device that meeting apps see as a normal microphone. Any virtual audio cable works; a popular free one is VB-Cable, used as the example below. You only need to install it once.
- Download VB-Cable from the official site: vb-audio.com/Cable.
- Unzip the downloaded folder.
- Right-click
VBCABLE_Setup_x64.exeand choose Run as administrator. - Click Install Driver, then restart your computer if prompted.
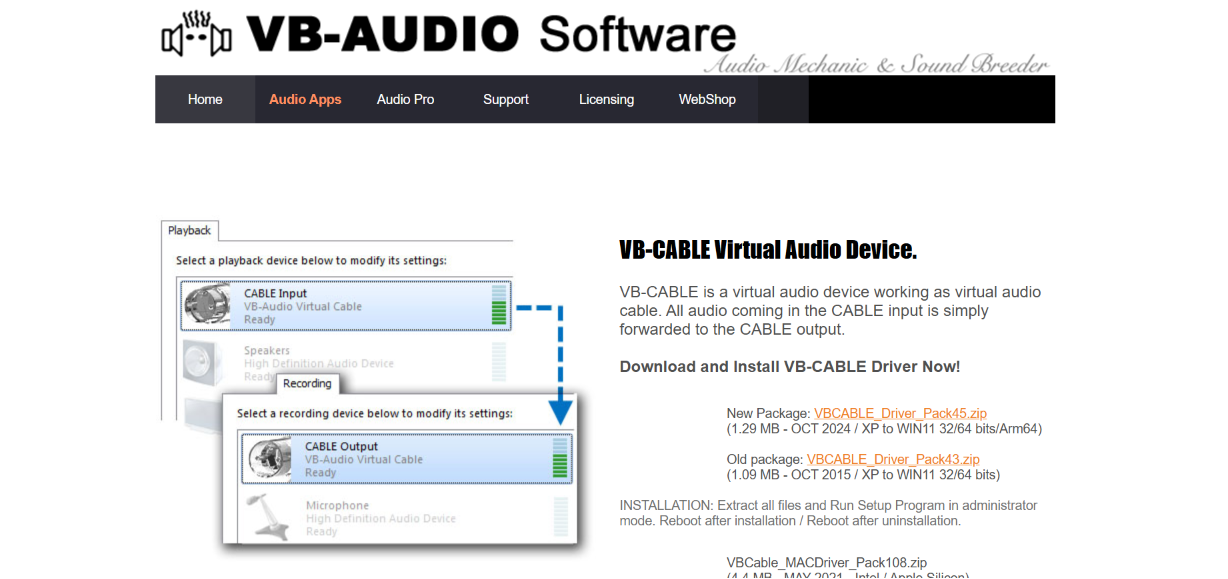
After installing, Windows will have a new audio device called CABLE Input — that's the virtual microphone TranslateMe uses.
If you plan to use Inbound Translation (hearing the far participant translated into your own language), install a second, independent cable pair from any vendor — for example Hi-Fi Cable alongside VB-Cable. One pair is enough for the outbound-only setup in this guide.
5. How to configure
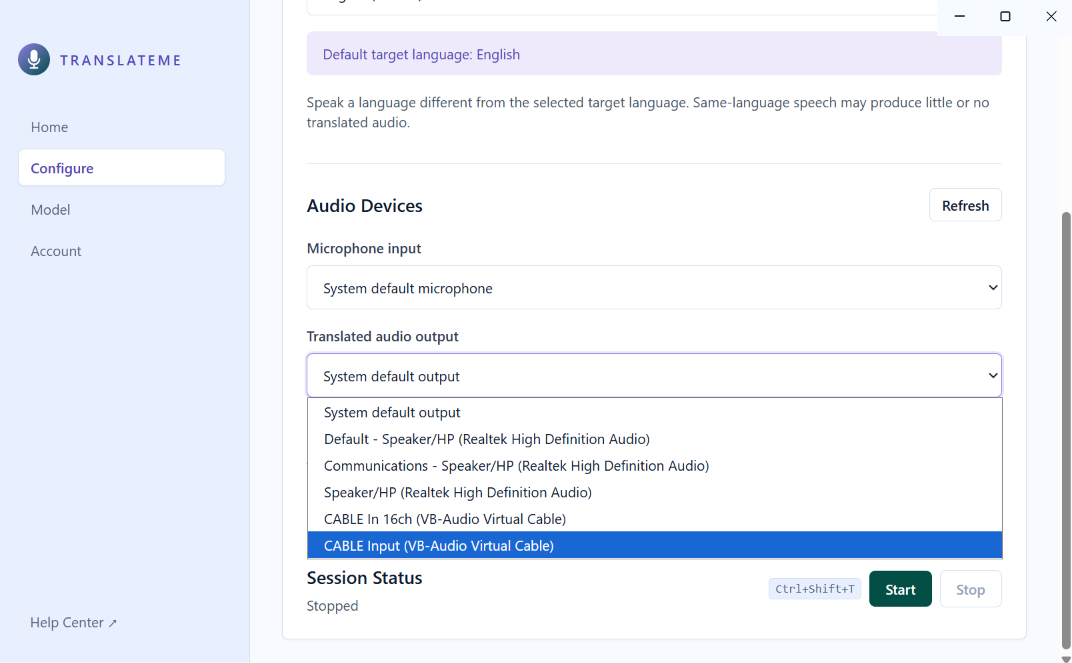
In TranslateMe, open the Configure tab. There are two audio devices to set.
Input — set this to your physical microphone, the mic you actually speak into.
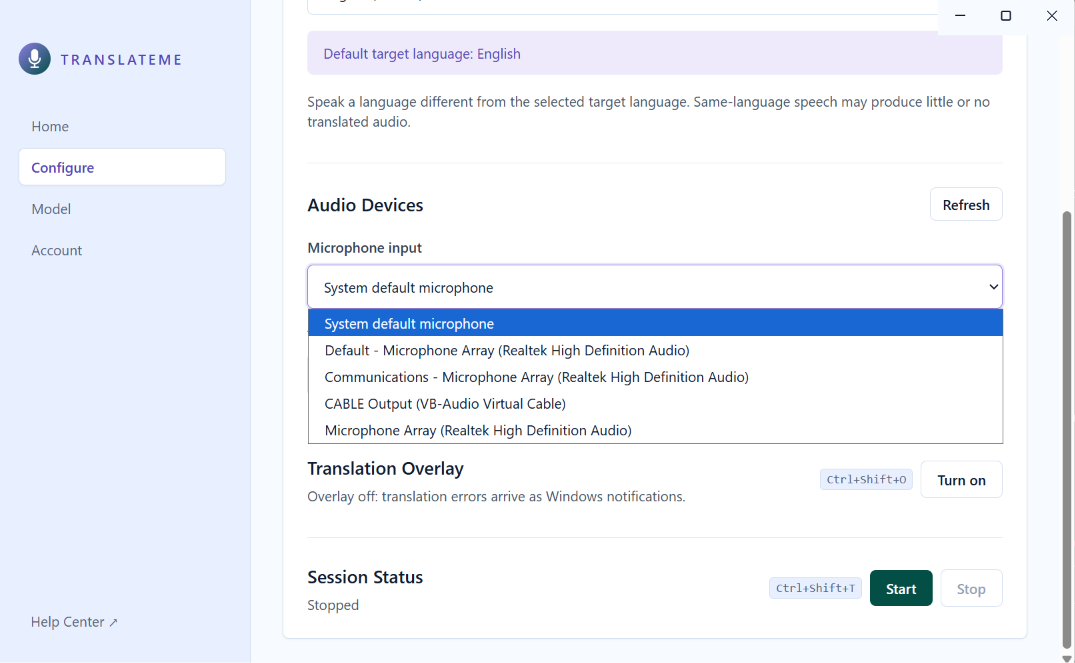
Output — set the translated-audio output to your virtual cable's playback end — with VB-Cable that's CABLE Input (VB-Audio Virtual Cable). This is the virtual microphone end that TranslateMe sends translated speech into.
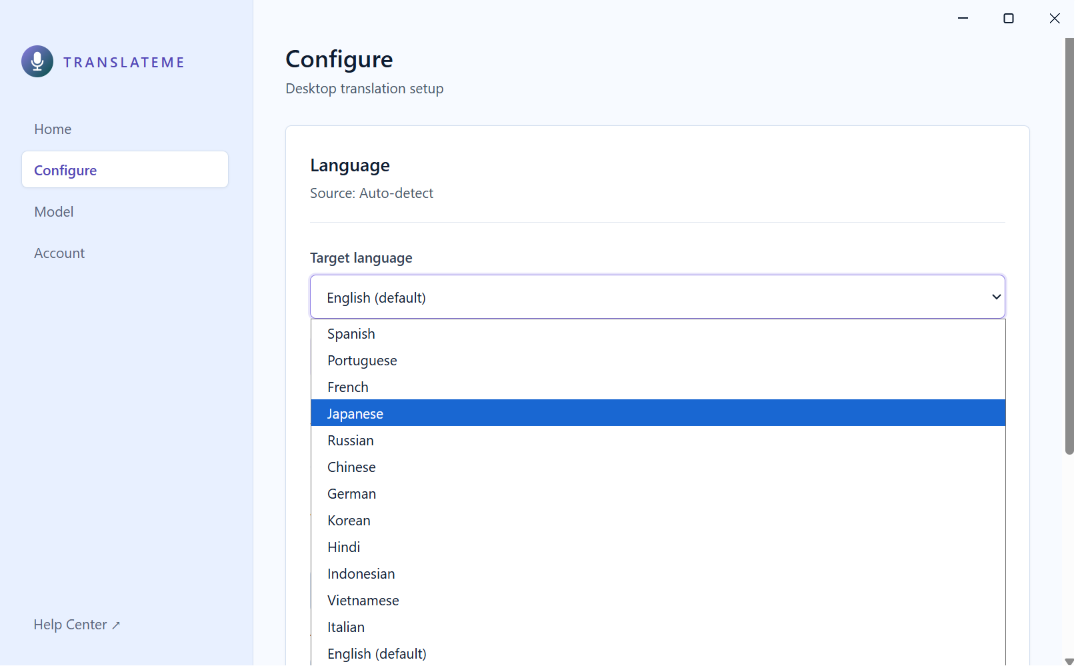
Then choose the target language the far participant should hear.
Use headphones during meetings to keep your speaker audio from feeding back into your microphone.
6. Adding an API Key
TranslateMe uses your own OpenAI API key to power translation during launch.
- Go to platform.openai.com/api-keys.
- Sign in or create an OpenAI account.
- Click Create new secret key, give it a name, and copy the key.
- In TranslateMe, open the Model tab and paste the key into the session key field.
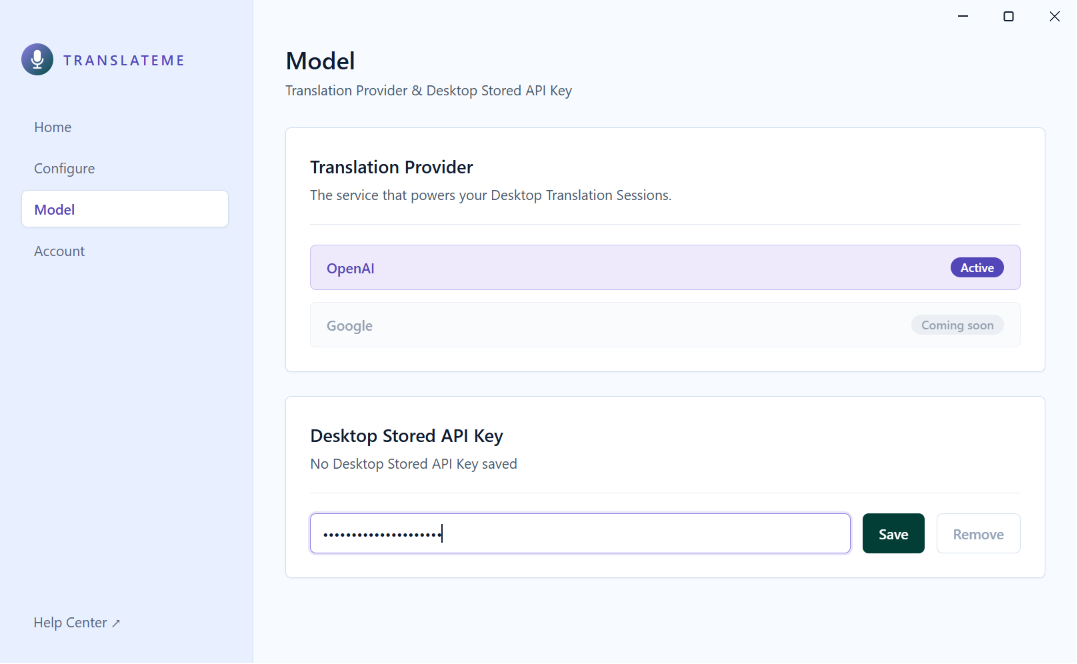
Your key is only used for the active session and is not stored by TranslateMe after you stop.
7. Your meeting app: usually nothing to do
If your meeting runs in a desktop app (Zoom, Discord, Microsoft Teams, etc.), you're done configuring. When you start a session, TranslateMe detects the running meeting app and points its microphone at the virtual cable automatically — and puts everything back the way it was when you stop. If the meeting app has a specific microphone picked in its own settings, set it to the system default so TranslateMe can route it.
If your meeting runs in a browser (like Google Meet in Chrome), set the devices yourself in the meeting's audio settings:
Microphone — set this to the recording end of your cable — with VB-Cable that's CABLE Output (VB-Audio Virtual Cable), the opposite end from the CABLE Input you chose inside TranslateMe.
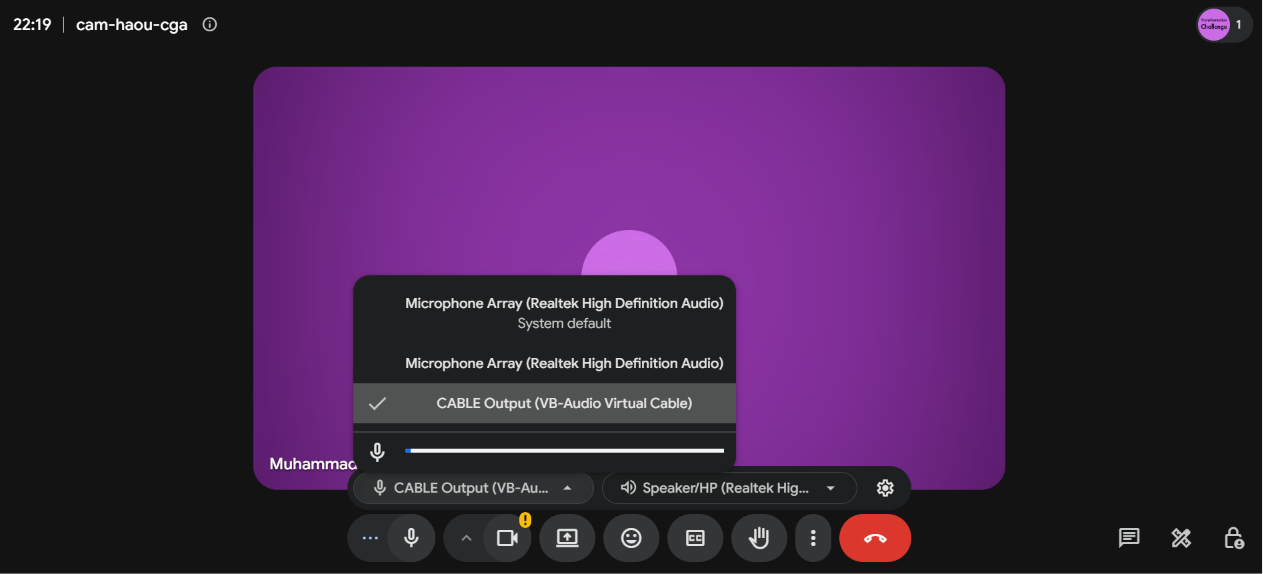
Speaker — keep this on your normal headphones or output device so you can hear the far participant. Do not set the speaker to a cable device.
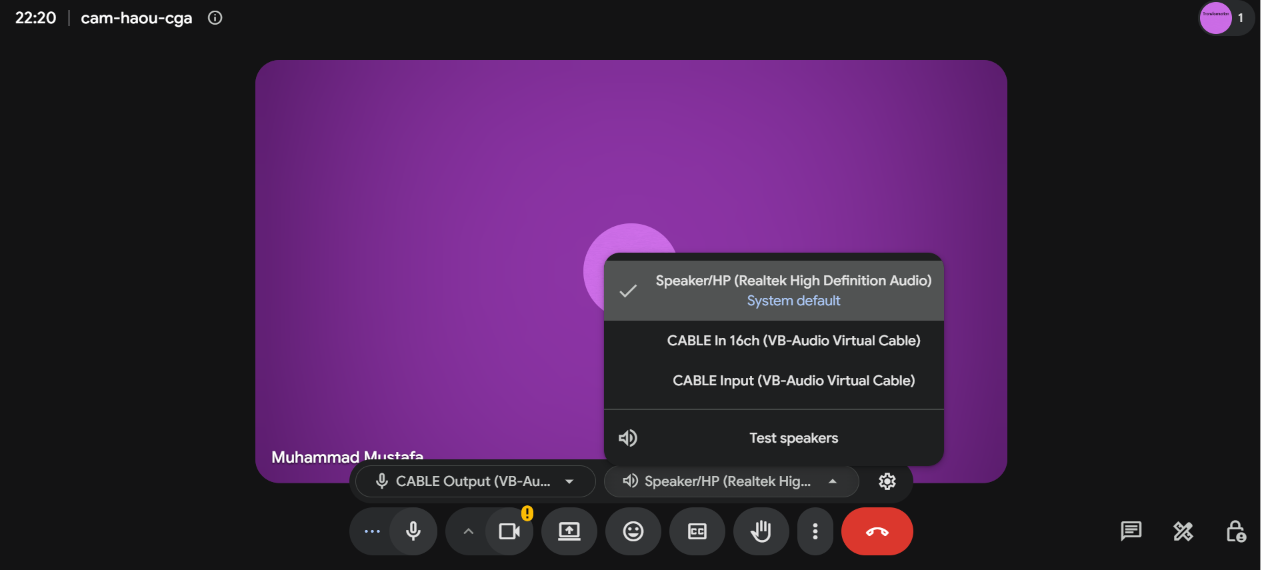
The same manual steps apply if TranslateMe tells you automatic routing isn't available on your PC — see How do I route meeting audio manually?.
8. Starting the Translation Session
You're ready to translate. Start a session in either of two ways:
- Click the Start button in TranslateMe, or
- Press the translation toggle hotkey, Ctrl+Shift+T.
The Session Control Pill appears — that's your signal translation is live. For desktop meeting apps, starting the session is also what wires the meeting app's audio to the cable. The far participant now hears your translated speech through the normal meeting audio path. When you're done, click Stop on the Session Control Pill (or press the hotkey again) to end the session and restore your previous audio setup.